Mommy Pehpot

Top Mommy Blogger Philippines- Super Mommy; Award Winning Mommy Blogger

  • Home
  • About Me
  • Work With Me
  • Daily Vlog
  • Disclosure
  • Events

Chicken Pepper Omurice

When Sofia and her bandmates were working hard for their school’s Battle of the Bands audition, I knew I wanted to prepare something special to reward their efforts. That’s how Chicken Pepper Omurice became the perfect choice for their merienda! Inspired by Pepper Lunch’s famous chicken pepper rice, but with my own Mommy Pehpot twist with omurice, this dish combines savory chicken, buttery rice, and a fluffy omelet. Let me share how I made this delicious treat, step by step.
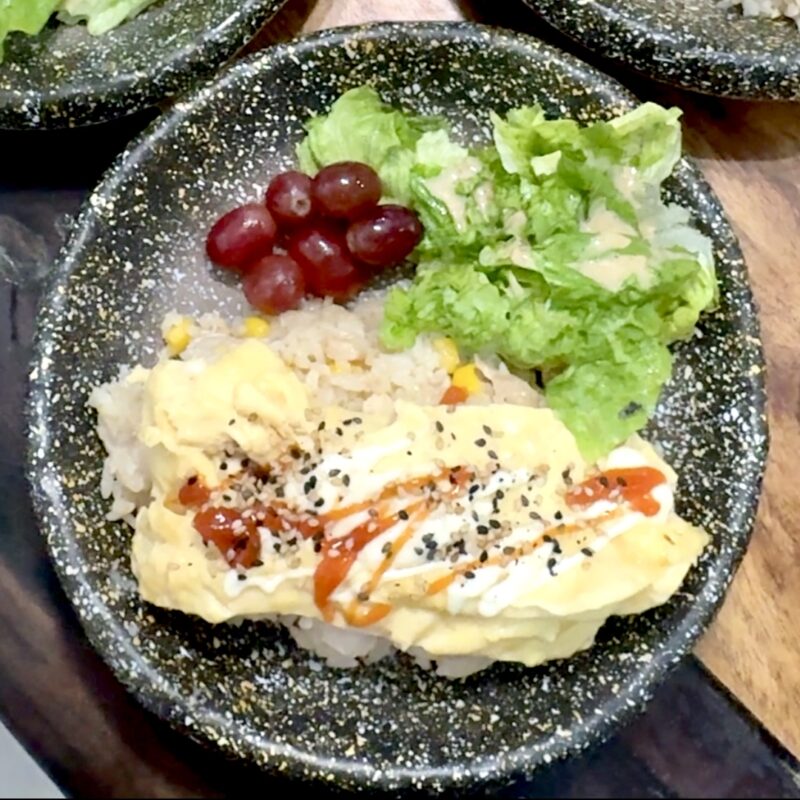
Chicken Pepper Omurice

Ingredients for Chicken Pepper Omurice

For the Chicken Pepper Rice:

  • 100g chicken breast or thigh, diced
  • 2 cups cooked rice
  • ¼ cup corn kernels
  • 1 tbsp margarine
  • 1 tbsp oyster sauce
  • 1 tsp sesame oil
  • Freshly ground black pepper (to taste)

For the Omelet:

  • 2 large eggs
  • 1 tsp oyster sauce (optional, for flavor)
  • 1 tsp butter or oil

Garnishes:

  • Ketchup
  • Mayonnaise
  • Sesame seeds (optional)
  • Fresh lettuce with roasted sesame dressing (optional)
  • Sliced fruits (optional)

Step-by-Step Guide to Make Chicken Pepper Omurice

Step 1: Prepare the Chicken Pepper Rice

This rice is the heart of the dish, packed with flavor and a lovely Pepper Lunch-style twist.

  1. Cook the chicken: Heat a pan over medium heat and cook the diced chicken quickly until no longer pink.
  2. Add the rice: Toss in the cooked rice, mixing it well with the chicken.
  3. Add corn kernels: Stir in the corn kernels for a sweet crunch.
  4. Add margarine: Drop in a spoonful of margarine and mix until the rice is buttery and rich.
  5. Season the rice: Pour in the oyster sauce and sesame oil, stirring to coat the rice evenly.
  6. Finish with pepper: Generously grind fresh black pepper over the rice for that signature “pepper rice” taste.

Step 2: Shape the Chicken Pepper Rice

For a special presentation, I shaped the rice into a boat. I used an aluminum mold to pack the rice tightly, then gently squeezed it into a boat shape. This little touch makes the dish stand out when served, especially if you’re cooking for guests or just want to impress the kids!

Step 3: Cook the Omelet

The omelet is the most challenging part, but with a little practice, you can nail that perfect, soft texture!

  1. Beat the eggs: In a bowl, whisk together the eggs and a teaspoon of oyster sauce for added flavor.
  2. Cook the omelet: Heat butter or oil in a non-stick pan over medium-low heat. Pour in the beaten eggs, tilting the pan to spread the mixture evenly.
  3. Scramble gently: While the eggs cook, gently beat them with chopsticks and swirl the pan so the eggs spread out smoothly. This technique keeps the omelet soft and fluffy.
  4. Set the edges: As soon as the edges start to set, use chopsticks or a spatula to carefully scrape around the edges of the omelet.
  5. Fold and shake: Once the center is still slightly runny, fold one side of the omelet over and give the pan a gentle shake to make sure the omelet doesn’t stick.
  6. Close and place on rice: When the omelet is cooked through, carefully place it on top of the rice. Make a small cut in the middle, allowing the omelet to open up slightly and reveal the soft interior.

Step 4: Garnish and Serve

For the finishing touch, drizzle the top of the omelet with ketchup and a light swirl of mayonnaise. Sprinkle sesame seeds for extra flavor, if you like.

I usually serve Chicken Pepper Omurice with a side of fresh lettuce topped with roasted sesame dressing and some sliced fruits to balance the richness of the dish. The result is a beautifully plated meal that’s satisfying and flavorful!

Why Chicken Pepper Omurice is the Perfect Merienda


@mommypehpot Chicken Pepper Omurice Para sa banda ni ate na sobrang sipag mag practice #omurice ♬ Cute – Bensound

This dish is a great combination of textures and flavors. The savory chicken pepper rice, with its buttery and peppery taste, pairs perfectly with the soft, fluffy omelet. Plus, the drizzle of ketchup and mayo adds a familiar comfort food vibe that both kids and adults enjoy. Sofia and her bandmates absolutely loved it!

If you’re looking for a creative twist on a classic, Chicken Pepper Omurice is easy to prepare and a guaranteed crowd-pleaser. It’s perfect for merienda, lunch, or even dinner. Plus, it’s a fun way to bring restaurant-inspired meals right into your home.

Final Thoughts

Making this dish was not only fun but also rewarding, especially seeing Sofia and her friends enjoy it so much. The Chicken Pepper Omurice has quickly become a family favorite, and I’m sure it will become a regular on your menu too!

Try it out for your next meal and let me know how it turns out. Happy cooking! ????

Follow Mommy Pehpot

For more cooking ideas or meryenda ideas, follow Mommy Pehpot on her socials:

  • Instagram: Chicken Pepper Rice Omurice Meryenda for ate and her bandmates @5centavoz para sa walang pagod na praktis
  • Tiktok:  Chicken Pepper Omurice Para sa banda ni ate na sobrang sipag mag practice #omurice
  • Facebook reel: Sobrang sipag magpractice ng band nila Sati for their audition kaya dapat lagi masarap ang meryenda nila.
  • Youtube Shorts: Chicken Pepper Omurice #MommyPehpot #mommyvlogger #foodblogger #Foodiemomph #food
  • X formeryl known as Twitter: Chicken Pepper Omurice para sa mga batang banda na masipag mag practice
Leave a Comment Filed Under: Babies And Kids, Baon Ideas, KIDS

Omurice Recipe: First Time To Cook

Marius has been requesting omurice for a while now, but I’ve always thought it was really difficult to make. Maybe he saw an omurice recipe  online or in some videos, and that’s why he’s been asking for it. Finally, I gave in and decided to give it a try!

Omurice Recipe
Omurice Recipe

Since it was my first time making it, I did a bit of research to make sure I wouldn’t mess it up. Surprisingly, my first attempt turned out quite well! Here’s my step-by-step guide to cooking Omurice, along with a few tips I picked up along the way.

Ingredients I Used for my Omurice Recipe

  • 3 eggs
  • 1 tsp oyster sauce (for flavor)
  • Cooked rice (shaped into a boat)
  • Salt and pepper to taste
  • 1 tbsp oil or butter (for cooking)
  • Ketchup and mayonnaise (for garnish)
  • Sesame seeds (optional, for garnish)

Step-by-Step Guide to Cooking Omurice

Step 1: Prepare the Rice

First, I shaped the rice into a boat and placed it on a plate. This step is important because the omelet will go right on top later, giving it that classic omurice presentation! The rice I used is left over rice from Eat Fresh restaurant.

Step 2: Beat the Eggs

For the omelet, I used 3 eggs. Instead of just salt and pepper, I added a bit of oyster sauce for extra flavor. You can also add a little milk or cooking cream if you want a fluffier texture—totally up to you!

Step 3: Heat the Pan

Make sure your pan is hot before adding the eggs. I used the “Tasty” pan that Marius bought, and I have to say, it’s pretty impressive—really non-stick! I brushed it with a little oil or butter to make sure the eggs cooked smoothly.

Step 4: Pour the Beaten Eggs

Pour the beaten eggs into the pan. Right after pouring, quickly grab a pair of chopsticks and start beating the eggs while swirling the pan in a circular motion. The key here is speed—you have to move fast so the eggs don’t set too quickly. I used medium heat to make sure it cooked just right.

Step 5: Check the Edges

Once the edges start to set, use the chopsticks to gently scrape them away from the sides of the pan. This helps prepare the omelet for folding. Then, carefully lift one side of the egg with a spatula to begin the fold.

Step 6: Flip the Omelet

Carefully shake the pan to make sure the omelet isn’t sticking. Once it’s free, flip the omelet to fold it completely. Be careful during this step—it’s easy to tear the egg!

Step 7: Place the Omelet on the Rice

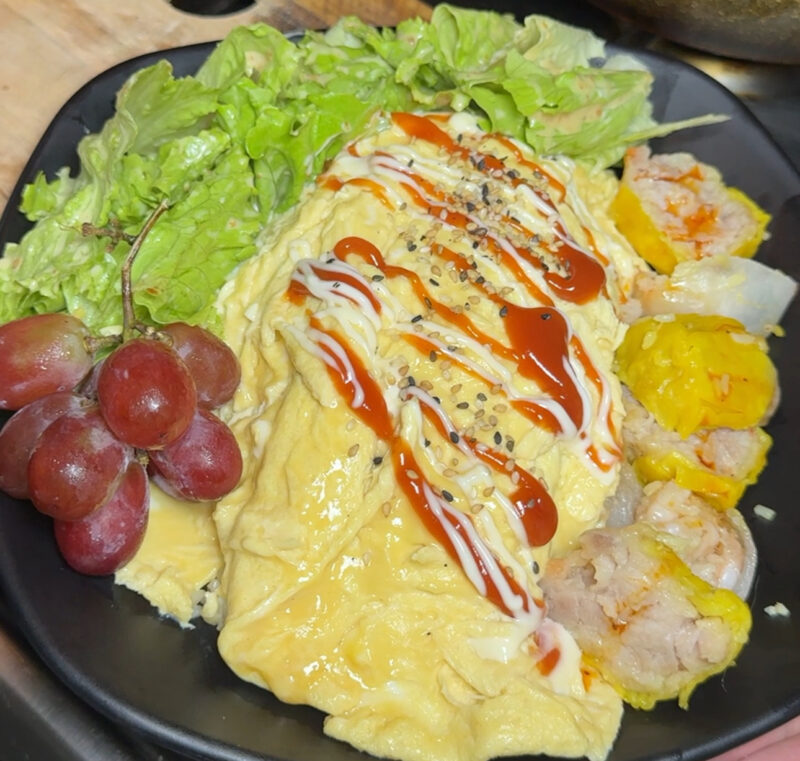
Now for the fun part! Gently place the omelet on top of the boat-shaped rice. Make a small cut down the middle and let the omelet open up naturally. If it doesn’t open perfectly, you can help it along—just like I did in my video!

Step 8: Garnish and Serve

For the final touch, drizzle ketchup and mayonnaise over the top of the omelet. I also sprinkled some sesame seeds to add texture and extra flavor. I also added some veggies and fruits on the side and some leftover dumplings also from Eat Fresh.

Marius’ Reaction to my Omurice Recipe


@mommypehpot No bashing ha, first time to cook omurice dahil request ni Marius ???????? #ommurice #mommypehpot #eggchallenge #almusalpinoy ♬ spin u round – Nafeesisboujee

As you can see in the video, Marius was so happy! Even though it was my first time cooking Omurice, I felt like a chef thanks to his reaction. Moments like this make cooking so rewarding, especially when you see how much your loved ones appreciate it. It was a bit challenging at first, but it was definitely worth it.

If you’re thinking of trying omurice at home, go for it! It’s a simple yet satisfying dish, and the joy on your family’s faces will make it all worthwhile.

Leave a Comment Filed Under: Babies And Kids, Baon Ideas, KIDS

Can I Give Guava To My Baby

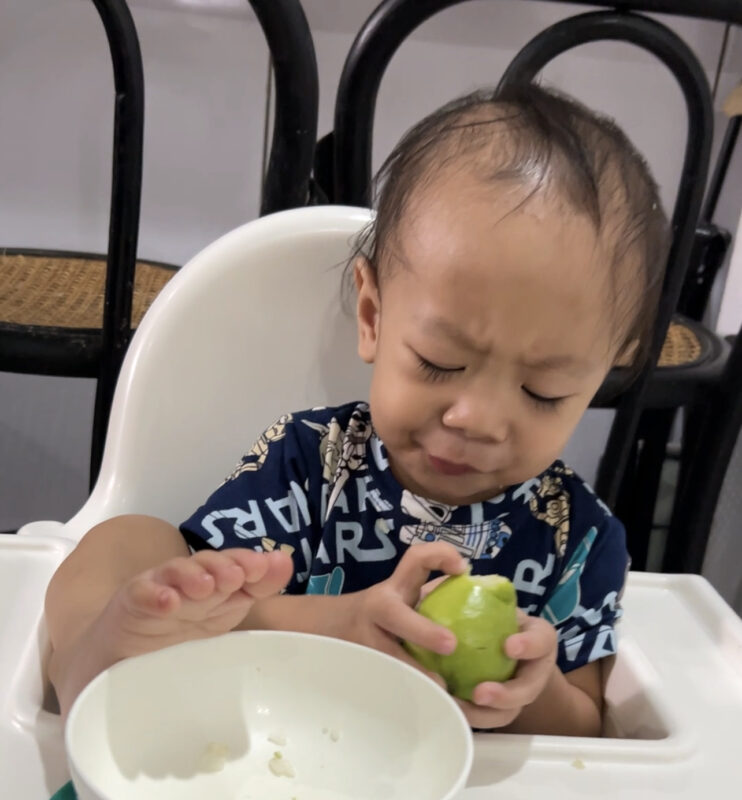
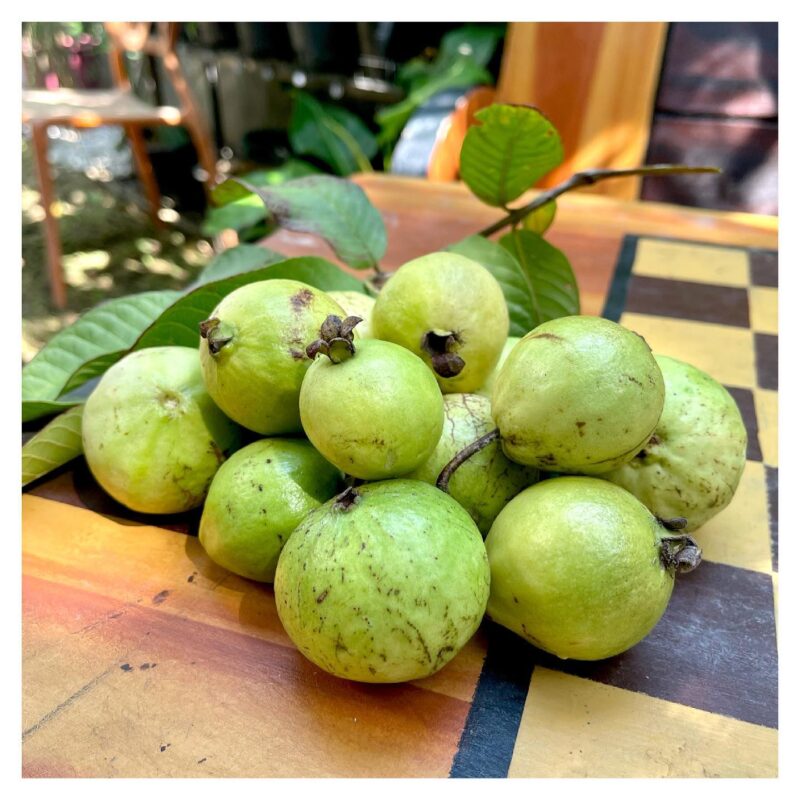
We have some guava trees in our garden, and it is bearing plenty of fruits. It’s guava season already and Mathieu’s been snacking on it. My mother asked me the question; Can I Give Guava to my baby? And the answer is yes! How early can you introduce guava to your baby? 6 months onwards is the best time to do it.

Guava is a nutrient-rich fruit that offers several essential vitamins and minerals. It is a good source of dietary fiber, vitamin C, vitamin A, folate, potassium, and antioxidants. These nutrients play crucial roles in promoting overall health, boosting the immune system, and supporting proper growth and development in baby.

Can I Give Guava To My Baby

Benefits of Guava for Babies

Now that we have answered the question, Can I Give Guava to my baby, let’s check the benefits.

Vitamin C Boost: Guava is exceptionally rich in vitamin C, which supports immune function and helps in the absorption of iron. Including guava in a baby’s diet can help enhance their resistance to illnesses.

Fiber Content: Guava contains dietary fiber, aiding digestion and preventing constipation. Introducing guava to your baby’s diet may help regulate their bowel movements and promote a healthy digestive system.

Antioxidant Protection: The antioxidants found in guava, such as lycopene and beta-carotene, can provide protection against cellular damage caused by free radicals. These compounds contribute to maintaining good eye health and reducing the risk of chronic diseases.

Essential Nutrients: Guava also provides essential nutrients like folate, potassium, and vitamin A, which are crucial for proper growth, brain development, and maintaining healthy skin and eyes.

Can I Give Guava To My Baby

Guidelines when introducing guava to your baby

Introducing Guava to Your Baby’s Diet: When introducing guava to your baby, it is important to follow a few guidelines:

  1. Age and Readiness: The American Academy of Pediatrics (AAP) recommends introducing solid foods, including fruits, around 6 months of age. Before introducing guava or any new food, ensure that your baby has reached the appropriate developmental milestones and shows signs of readiness, such as sitting up with minimal support and displaying an interest in food.
  2. Allergies: Guava is not a common allergenic fruit. However, it’s always important to be cautious when introducing any new food to your baby. Start by offering a small amount of guava puree or mashed guava and observe for any adverse reactions, such as rashes, hives, or digestive issues. If there is a family history of food allergies, consult with your pediatrician before introducing guava.
  3. Preparation: To introduce guava, start by choosing a ripe fruit with a soft texture. Wash the fruit thoroughly and remove the skin and seeds. Mash the guava or puree it to a smooth consistency, ensuring there are no lumps that could pose a choking hazard. Mix the puree with breast milk, formula, or water to achieve the desired consistency.
  4. Quantity and Frequency: Begin by offering a small amount of guava puree once a day, gradually increasing the portion size as your baby gets accustomed to the taste and texture. Remember that breast milk or formula should remain the primary source of nutrition for babies until the age of one.

Conclusion: Guava is generally considered safe and nutritious for babies, offering a range of health benefits. With its high vitamin C content, fiber, and essential nutrients, guava can be a valuable addition to a baby’s diet. However, always ensure that your baby is developmentally ready for solid foods and monitor for any signs of allergies or adverse reactions. As with any new food, it’s best to consult with your pediatrician before introducing guava or any other fruit to your baby’s diet.

Leave a Comment Filed Under: Babies And Kids, Baby, KIDS

  • « Previous Page
  • 1
  • 2
  • 3
  • 4
  • 5
  • 6
  • …
  • 128
  • Next Page »
Mommy Blogger Pehpot

Search

Popular Posts

  • Nutrition Month Celebration and Costume Ideas
    Nutrition Month Celebration and Costume Ideas
  • Smart Plan iPhone 17 Pro Max: No DP Renewal Experience
    Smart Plan iPhone 17 Pro Max: No DP Renewal Experience
  • Astoria Raffle Winners
    Astoria Raffle Winners
  • Solaire Promo: Free Jesus Christ Superstar Tickets
    Solaire Promo: Free Jesus Christ Superstar Tickets
  • Price of Aluminum Screen Door in the Philippines
    Price of Aluminum Screen Door in the Philippines
  • Low Sugar Rice Cooker: How To Use
    Low Sugar Rice Cooker: How To Use
  • 3 Important Things You Need To Know About Primary Complex (and other treatment tips)
    3 Important Things You Need To Know About Primary Complex (and other treatment tips)
  • Issy Customizable MakeUp Palette
    Issy Customizable MakeUp Palette
  • Chowking 40th Anniversary
    Chowking 40th Anniversary
  • Pasig Family Fun Run: Mommy Milkshake Run
    Pasig Family Fun Run: Mommy Milkshake Run

Recent Posts

  • Kiddie Kitchen by Abi “Lumpia Queen” Marquez
  • The Crafters Marketplace Crafting Event
  • Abi Marquez Launches Her Official Apron as Hedley & Bennett’s First Filipino Collaborator
  • Robinsons Department Store Back To School Promo
  • Waffles with Chicken Strips Meryenda For Kids
  • Top 5 Reasons Why You Must Watch Jesus Christ Superstar
  • Cheesy Chicken Katsu Recipe Kids Will Love
  • 10 FAQs Before Watching Jesus Christ Superstar Manila
  • Jesus Christ Superstar Merchandise and Prices
  • Civago Water Bottle Review for Daily Hydration

Home and Living

Waffles with Chicken Strips Meryenda For Kids

Cheesy Chicken Katsu Recipe Kids Will Love

Ham and Cheese Sandwich Recipe

Blog Buzz & Media Updates

Abi Marquez Launches Her Official Apron as Hedley & Bennett’s First Filipino Collaborator

Robinsons Department Store Back To School Promo

Solaire Promo: Free Jesus Christ Superstar Tickets

Get more mommy stories and parenting tips straight to your inbox:

Useful Links

  • Kids
  • Home & Living
  • Parenting
  • Personally Pehpot

PSA Birth Certificate Delivery Service

PSA Birth Certificate Delivery Service

SEARCH MY WEBSITE

· Copyright © 2026. Site brewed with love by Squeesome Design Studio ·